I have gone from being a movie buff to being a documentary and makeup video buff. I have tried to go back to being a movie buff. I kinda miss how I could just lose myself in a chick flick and forget about all my worries for 1.5-2 hours. But I guess I am more attached to the old movies and maybe who I was when those movies first came out (can’t buy me love, hope floats, practical magic). Now I watch a movie and if there are animals in it I wonder if they were treated well in the making of the movie. Often I recognize a sinister underlying political agenda they are trying to push and it just ruins it for me. But I can always lose myself in makeup, so I thought I would share some of my favorite makeover videos – and maybe do this on a fairly regular basis. Even if they are not using my makeup, I hope you can focus on the placement of the makeup. I will include some notes with a couple of them so that you know what h a u t product shades would be parallel with what the artist is using.
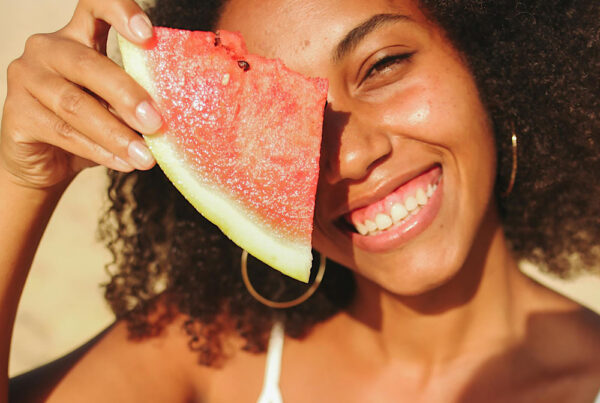
This first one I wanted to share with you a) because I just really love her energy and positivity b) because I want you to remember that when you see a ‘finished’ makeover photo on social media and you think to yourself, ‘Why can’t I get my makeup to look like that?’ or, ‘Why can’t my skin look like that?’….well – a lot of reasons! She is young, she has great social media lighting, AND her makeup probably takes about 40 minutes to an hour to apply. Do you have that kind of time? If not you need to give yourself a break. For some of these artists, this is their career. So if you do not have that kind of time, it is important to be realistic. There is real life and there is Instagram. Sometimes things look so simple and easy for everyone else but they are often not. You are just seeing their edited ‘highlight reel’. I encourage you to watch this video on your laptop or desktop if you can so that you can see that she does in fact pack on a fair amount of makeup for that ‘perfect YouTube complexion’. And to get it just right and ‘natural’ for the camera, she probably has something closer to drag queen makeup in real life. I am in no way trying to be mean. I did this kind of makeup in makeup school. I just want to point out that for makeup to look great for the camera it has to be quite heavy in real life. So if you have any family photos coming up, that is a good tip. You will also notice that her foundation is more on the yellow side, also because yellow looks better in videos and photography.
https://www.instagram.com/p/Bn6qCZ_gT3D/
My second video is by Maskcara, and she gives clear, down-to-earth instruction when it comes to mature makeup. She uses very similar makeup techniques to mine when it comes to highlighting and contour. When you just want a natural look, you want your focus to just be brows, highlighting and contour. practice makes all the difference. Just send me a message (click on the green box in the bottom right) if you are wondering about a h a u t product shade you can use in place of what she is using!
Unless you are medium to dark skin tone, I recommend the yellow brightener for highlighting. If you are have more colour to your skin then deep yellow will work best. As far as choosing sesame brightener or the original, the original is a more matte cream and sesame is a more creamy cream. If you are not sure which texture you prefer, try a couple samples. The sesame brightener is closer to the mango bb balm in texture where the original brightener is closer to the concealing hdd. I also recommend the concealing hdd and if you need lots of coverage, try the coconut-free version!
Also, for those of you who wonder why I recommend the CARAMEL TAN year round, MASKCARA explains it well. She uses a spray tan and it is not natural but her reasoning behind it mirrors why I could not live without a ‘tan’. It is not just about the tan, it benefits the skin colour as a whole from forehead to the neck, upper chest, and beyond. Keep in mind that the CARAMEL TAN takes 1-2 days to develop so if you need an instant ‘tan’ or if you do not want to incorporate the CARAMEL TAN at all, I would recommend a coconut bb cream shade that is 3-4 shades darker than your skin tone as a base from forehead to chest. She articulates the reasoning behind it better than I have ever could so I will let her explain…
This is a great video by HOT & FLASHY if you want to practice doing corrective or no-makeup makeup. This can be helpful around the holidays when you want to look polished even if you just have a few minutes. This also reminds you what areas to concentrate on. Everyone is different so it is important to look at where you need the most brightening and evening-out. Also every day can be different, depending on how much sleep you had etc. She does some great brow instruction too:
And because a lot of my clients ask about the under-eye area, I am going to leave you with this helpful video also by MASKCARA. She is also explaining her reasoning behind using a self tanner on the skin in this video. She recommends a colour called STONE for a bronzer/contour. If you think you would suit a similar colour, I highly recommend ILLUMINATING ALOE LOOSE TINT! I always recommend in order, cream foundation, bio-foundation, brightener, then colour and more bio-foundation if needed, and a little pat of coconut cream on upper cheek bones and anywhere else you would like a soft glowy sheen:
Oops! I forgot, I wanted to share one more. This last one has nothing to do with makeup but it does have to do with your inner makeup. It explains one of my newest tools, the zapper and again, this beautiful girl explains it in such a down-to-earth way that it gets me excited about it all over again. If I do not get phenomenal results from something myself, I do not promote it. This device has been like my secret weapon this year:
